Under Sink Cabinet Floor Replacement: Durable Solutions for Easy Installation
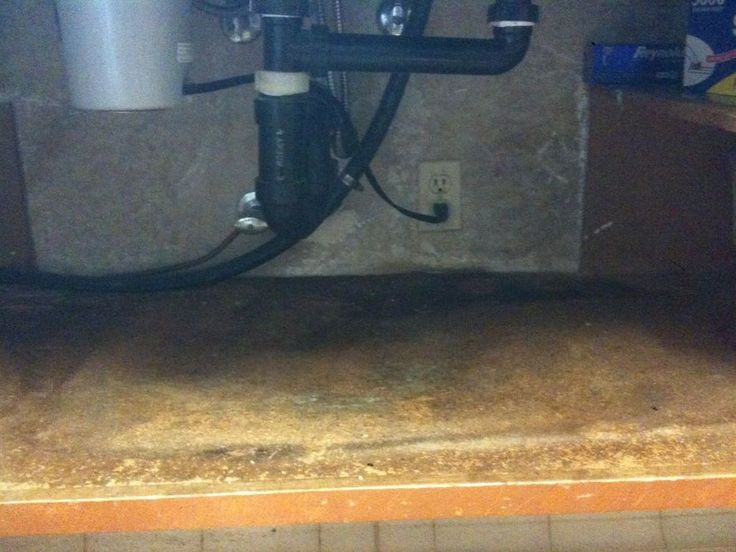
When water damage, persistent leaks, or outdated aesthetics compromise the integrity of your kitchen’s lower cabinet, addressing the problem beneath the sink becomes a priority. The floor under this high-moisture zone endures constant exposure to spills, cleaning chemicals, and the weight of heavy bottles, making it uniquely vulnerable to warping, rot, and structural failure. Replacing this section of cabinetry is not merely an aesthetic upgrade; it is a fundamental maintenance task that protects your home’s value and ensures a safe, functional workspace.
Why the Under Sink Area Demands Immediate Attention
Unlike other sections of the kitchen, the area beneath the sink operates in a high-stress environment. Minor plumbing leaks, even those that appear insignificant, can saturate the subfloor and cabinet materials over time, creating an ideal environment for mold growth and wood decay. The constant weight of cleaning supplies, gallons of water, and plumbing fixtures places immense pressure on the structure, often leading to sagging or complete collapse of the cabinet base. Ignoring these warning signs, such as soft spots, discoloration, or a musty odor, can result in costly repairs that extend far beyond the cabinet itself.
Assessing the True Scope of the Damage
Before initiating a replacement, a thorough inspection is essential to distinguish between a localized floor issue and a systemic problem. You must determine if the damage is confined to the bottom shelf or if it has spread to the adjacent toe kicks, side panels, or the cabinet’s framing. Look for signs of compromised structural integrity, such as the cabinet floor feeling spongy to the touch or the entire unit leaning to one side. In many cases, the visible floor is the only part suffering, while the vertical boxes remain solid, which can save you time and money on the project.


Material Matters: Choosing the Right Replacement
The success of the replacement hinges on selecting materials that can withstand the unique challenges of the under-sink environment. Standard drywall or MDF core materials will inevitably fail when exposed to moisture, making them unsuitable for this application. Instead, opt for materials specifically designed for wet areas to ensure longevity and prevent future disasters.
| Material | Best For | Key Benefit |
|---|---|---|
| PVC or Vinyl Plank Flooring | Maximum water resistance | Fully waterproof and easy to clean |
| Epoxy-Coated Plywood | Heavy-duty durability | Resists scratches and chemicals |
| Bamboo or Strand-Woven Bamboo | Sustainable strength | Naturally resistant to moisture and impact |
The Step-by-Step Replacement Process
Executing a flawless replacement requires precision and a methodical approach to avoid future complications. The process begins with clearing the area and shutting off the water supply valves located in the cabinet. You will need to disconnect the plumbing, carefully remove the old flooring, and inspect the joists for any sign of rot. If the wooden support structure is compromised, it must be repaired or replaced before installing the new surface to ensure the longevity of the repair.


Installation Best Practices
To guarantee the new floor performs optimally, adherence to specific installation protocols is critical. You should always use a moisture barrier between the subfloor and the new material to prevent rising damp from penetrating the wood or composite layers. When securing the new floor, avoid standard nails that can create entry points for moisture; instead, utilize waterproof construction adhesive or specialized clips designed for the chosen material. Proper sealing of all edges and seams with a high-quality silicone caulk is the final defense against water intrusion.
Integrating Safety and Functionality
A successful floor replacement goes beyond structural repair; it should enhance the safety and ergonomics of your kitchen. Consider incorporating non-slip additives or textured surface materials to prevent accidents when the floor is wet from routine cleaning or a plumbing mishap. If the cabinet floor is uneven due to previous damage, this is the perfect opportunity to correct the level, ensuring that pots and pans slide in and out smoothly without catching on the cabinet frame.
Long-Term Maintenance Strategies
To maximize the return on your investment, adopting a proactive maintenance routine is necessary to preserve the integrity of the new surface. Wipe up spills immediately, particularly those containing acids or alkalis, and periodically reapply a protective sealant if the material is porous. Regularly inspect the plumbing fixtures beneath the sink for any signs of slow drips, as preventing moisture accumulation is the most effective way to protect your newly installed floor from future decay.




Related Articles
Easy Under Sink Cabinet Bottom Replacement Tips
Leaking pipes, persistent humidity, and general wear and tear often manifest first under a sink, making the cabinet bottom one of the most vulnerable zones in...

Amazon Car Rug: Durable Custom Fit Floor Mats For Easy Installation
Stepping into a vehicle with muddy boots, wet pets, or tracked-in debris is an experience familiar to any driver. This is where the humble car rug steps in...

Replacement Fridge Shelves: Durable, Easy-Fit Solutions for Easy Organization
Finding the right replacement shelves for fridge can feel like a surprisingly complex task. A single cracked, stained, or bent shelf turns your entire...

The Ultimate Guide to the S Trap Under Sink: Installation, Problems & Solutions
For many homeowners, the bathroom sink is a daily necessity, but the complex plumbing hidden behind the wall often remains a mystery. The S trap under sink...

Pull Down Cupboard Shelves: Easy DIY Installation & Accessibility Solutions
Tucked away in the highest corner of your kitchen, the area above your head is often the most underutilized space in your home. This is where a pull down...

Stainless Steel Utility Sink with Drainboard: Durable & Easy Clean
For kitchens that demand a blend of industrial durability and practical design, the stainless steel utility sink with drainboard stands as an indispensable...