How to Replace a Sink Cabinet: DIY Guide & Tips
Replacing a sink cabinet is one of the most effective ways to update the look and functionality of your bathroom or kitchen without a full remodel. Whether you are dealing with water damage, outdated styling, or simply need more storage, this project is approachable for most DIY enthusiasts. The key to success lies in meticulous preparation, selecting the right materials, and following a logical sequence of steps. This guide walks you through the entire process, ensuring you achieve a professional-looking result that stands the test of time.
Before you remove the old unit, you must gather all the necessary tools and materials. Having everything at arm's length prevents frustrating mid-project trips to the hardware store and keeps your workflow efficient. You will need new cabinetry, appropriate fasteners, sealant, and safety equipment. A well-prepared toolkit is the foundation of a seamless installation.
Safety and Preparation
Safety is paramount when working with plumbing and heavy fixtures. The first step in any replacement is to shut off the water supply valves located under the sink. Open the faucet to drain any remaining water from the lines and place a towel or bucket beneath the pipes to catch residual drips. Disconnecting the water without shutting off the supply is a common and messy mistake that can flood your space. Furthermore, wearing safety glasses protects your eyes from debris when cutting or prying away the old cabinet.


Turning Off Water and Clearing the Space
Locate the hot and cold water valves under the sink and turn them clockwise until tight. If your valves are old and stiff, use a wrench gently to avoid stripping the fittings. After closing the valves, test the faucet to confirm the lines are empty. Next, clear the area around the sink of personal items and cleaning supplies. You need a clear workspace to maneuver the new cabinet and access the plumbing connections without obstruction. Move the mirror or other fixtures out of the way if they impede your work.
Removing the Old Cabinet
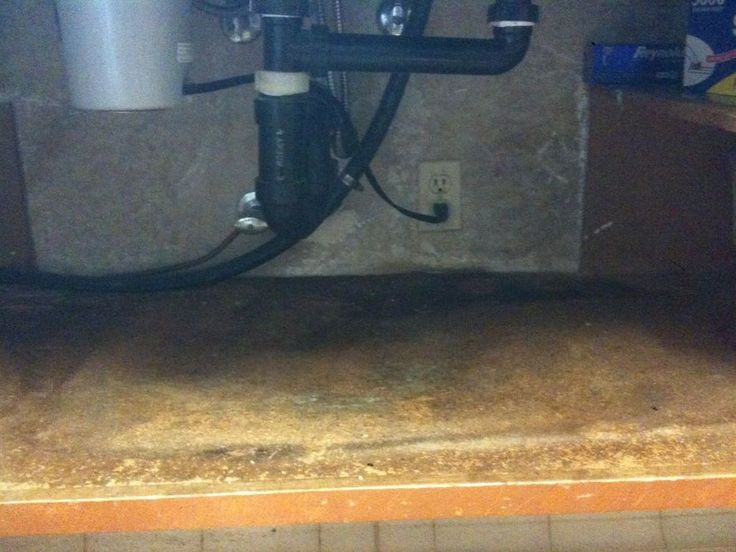
With the water off and the area clear, you can focus on removing the existing cabinet. Most sink cabinets are secured with mounting screws that run from the underside of the countertop into the cabinet body. You will need to crawl underneath the sink to access these screws and remove them carefully. As the screws loosen, support the weight of the old cabinet with one hand to prevent it from falling and damaging the sink or pipes. Once the fasteners are removed, gently pull the cabinet away from the wall or vanity.


Handling Plumbing Connections
Depending on your setup, the sink drain and water lines may be attached directly to the cabinet or the wall. If the pipes are connected to the cabinet, loosen the nuts securing the P-trap and supply lines by hand. Keep a rag handy to catch any drips. If the pipes are fixed to the wall, you generally do not need to touch them. The goal is to detach the cabinet while leaving the plumbing infrastructure intact and ready for the new unit.
Installing the New Cabinet
With the old unit removed, you can inspect the area for any damage or residue. Cleaning the surface ensures a flat and secure fit for the new cabinet. Position the new cabinet precisely where the old one sat, aligning it with the edges of the countertop for symmetry. Before tightening the screws, verify that the cabinet is level horizontally and vertically. Adjusting the position now prevents uneven gaps and instability later.
Securing and Finishing
Drive the mounting screws through the cabinet frame and into the underside of the countertop, following the pattern of the pre-drilled holes. Tighten the screws securely, but do not overtighten, as this can crack the new cabinet material. Once mounted, reattach the P-trap and supply lines, tightening the nuts by hand and then giving them a quarter-turn with a wrench to lock them in place. Turn the water supply back on slowly and check the connections for leaks. A final wipe-down with a dry cloth ensures the cabinet is pristine and ready for use.


Related Articles
Easy Under Sink Cabinet Bottom Replacement Tips
Leaking pipes, persistent humidity, and general wear and tear often manifest first under a sink, making the cabinet bottom one of the most vulnerable zones in...

Cabinet Vision User Manual: Ultimate Guide & Setup Tips
Welcome to the definitive guide for navigating the Cabinet Vision user manual. Whether you are a first-time installer or a seasoned professional, understanding...

The Ultimate Kitchen Island Sink Cabinet Guide: Stylish & Functional Storage Solutions
The kitchen island sink cabinet represents the convergence of two essential elements in modern kitchen design: the hub of meal preparation and the primary...

How to Replace a Sink Stopper: Easy Step-by-Step Guide
Few household issues are as frustrating and disruptive as a sink stopper that refuses to function. A stuck or broken stopper transforms a simple washing task...

Replace Double Kitchen Sink with Single: Modern Space-Saving Guide
For many homeowners, the standard double kitchen sink feels like a given. It promises simultaneous functionality, a place to soak pots on one side while the...

Effortless Guide to Replace Kitchen Sink Plumbing: Step-by-Step DIY Solutions
Replacing kitchen sink plumbing is often the first step toward a high-functioning and stylish kitchen. A faulty setup under the sink leads to constant leaks...