How to Replace a Lawn Mower Cord: Easy Step-by-Step Guide
Dealing with a frayed or snapped pull cord is one of the most common and frustrating issues faced by lawn mower owners. This simple component endures significant stress every time you start the engine, and over time, it simply wears out. Whether your cord is stuck, partially wound, or has completely disintegrated, the solution is usually straightforward: a replacement. This guide will walk you through the entire process of how to replace cord on lawn mower, ensuring you can get back to maintaining your garden without unnecessary hassle or expense.
Before you begin, it is essential to understand that safety is the absolute priority when working on a small engine. The recoil starter contains a powerful spring under tension that can cause serious injury if handled improperly. Patience and respect for the mechanism are more important than speed. By following the steps outlined below, you will mitigate the risks and complete the repair efficiently.
Assessing the Damage and Gathering Tools
Not all cord issues are the same, and diagnosing the problem correctly saves you time and prevents partial repairs. Sometimes, the cord is merely tangled or stuck inside the housing. Other times, it has completely unraveled or the plastic grip has shattered. If the cord won't retract, it might be tangled around the spindle or the recoil mechanism might be broken. Take a moment to inspect the recoil assembly visually before committing to a full replacement.


To execute the repair successfully, you will need a specific set of tools. Having everything ready prevents you from halfway through the job only to realize you need a part or a specific socket. The process is generally inexpensive and requires minimal mechanical aptitude, making it an excellent DIY project for any homeowner.
- Replacement pull cord (correct length and diameter)
- Socket wrench set or open-end wrenches
- Screwdriver (flathead and Phillips)
- Pliers or a vice grip
- Utility knife or scissors
- Work gloves and safety glasses
Removing the Old Cord: The Disassembly Process
The core of learning how to replace cord on lawn mower lies in accessing the recoil starter. This requires removing the engine's pull cord housing cover. Typically, this is secured by a few screws located on the side of the mower housing or the engine block. Use the appropriate screwdriver or socket to carefully remove these screws, taking care not to drop them into the engine area.


Once the cover is removed, you will see the recoil starter mechanism. Before cutting the old cord, you must release the tension on the internal spring. The safest way to do this is to manually hold the recoil starter assembly still. You may need to lock the blade by inserting a wooden stick or a specialized tool into the discharge chute to prevent the engine from accidentally turning over while you work.
Releasing the Spring Tension
This step is critical and requires caution. The spring inside the recoil starter is under high tension and will snap violently if released too quickly. To safely drain the tension, slowly and carefully pull the recoil starter handle down until you feel the resistance lessen. You may need to hold it in the fully extended position with one hand while you work with the other.
With the tension neutralized, you can now cut the knots or remove the staples that hold the old cord in place on the recoil hub. Unwind the old cord completely from the spindle. At this point, you can discard the old cord and inspect the recoil hub for any signs of wear or damage that might affect the new installation.


Winding the New Cord
Installing the new cord is the most technical part of the process. Simply threading it through the housing is not enough; proper winding is essential for the mower to start. First, insert the new cord through the recoil hub, ensuring it aligns with the internal groove or teeth.
You will need to wind the cord tightly in the direction the recoil spring wants to turn. Usually, this is clockwise. Wind the cord tightly for about six to eight turns, leaving a few inches of excess for tying the knot. Ensure the wind is tight and even; loose winding will cause the cord to slip and fail to retract.
| Step | Action | Tip |
|---|---|---|
| 1 | Insert cord through hub | Align with internal groove |
| 2 | Wind tightly clockwise | 6-8 turns for tension |
| 3 | Secure with knot | Use a sturdy knot like a clove hitch |
Reassembly and Testing
With the new cord properly wound, you need to secure it in place. Tie a firm knot at the end of the cord to prevent it from unraveling inside the housing. If the cord passes through a plastic anchor or grommet, ensure it is seated correctly before reassembling the cover.


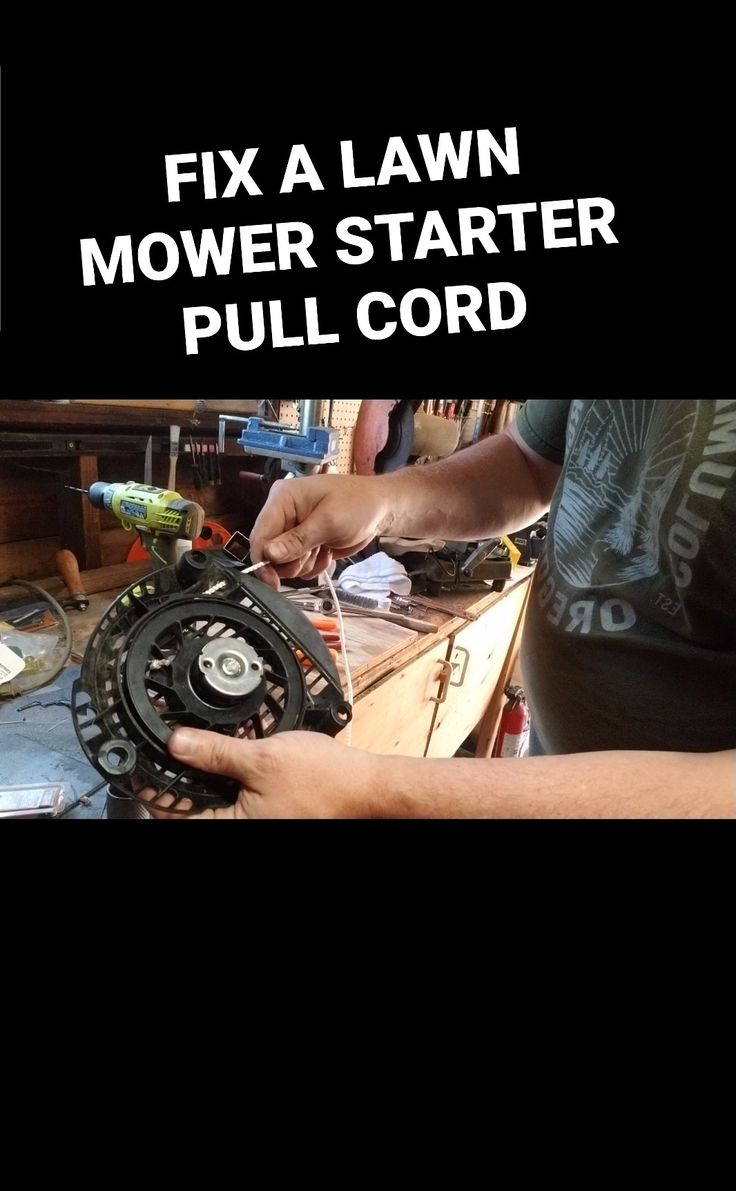


Carefully place the recoil starter cover back onto the engine and secure it with the screws you removed earlier. Once reassembled, you must test the mechanism. Pull the cord slowly to ensure it retracts smoothly without catching. If it pulls easily, you likely did not wind the spring correctly or the knot slipped. Once the retraction feels solid, give the mower a final test start to confirm the engine fires up reliably.
Related Articles

Fix Lawn Mower Engine: Easy Step-by-Step Guide
Few things are more frustrating than heading out to mow the lawn, only to have your machine sputter and die. A non-starting engine usually stems from a simple...
How to Change a Pull Cord on a Lawn Mower: Easy Fix Guide
A frayed or snapped pull cord can bring your lawn care routine to a sudden halt, but replacing it is a task most homeowners can complete in under thirty...

Replace Garbage Disposal Cord No Plug: Easy Step-By-Step Guide
Facing a garbage disposal cord replacement no plug scenario is a common yet stressful kitchen dilemma. When the power connection is severed, the unit becomes...

How to Replace Kitchen Faucet Gasket: Easy Step-by-Step Guide
Few household maintenance tasks are as frustrating than a persistently leaky kitchen faucet. That steady drip, drip, drip not only wastes water and drives up...

How to Replace a Toilet Overflow Tube: Easy Step-by-Step Guide
A wobbling toilet tank or a constant sound of running water often points to a faulty component within the cistern. While the issue might seem daunting, the...

How to Replace a Sink Stopper: Easy Step-by-Step Guide
Few household issues are as frustrating and disruptive as a sink stopper that refuses to function. A stuck or broken stopper transforms a simple washing task...