How to Patch Holes in Brick Wall: Simple DIY Fixes
Few things are as jarring as seeing a sudden crack or hole mar the clean line of a brick wall. Whether it is the result of an unexpected impact, ground movement, or freeze-thaw cycles, a damaged mortar joint or missing brick demands attention. Ignoring the issue allows water to penetrate, leading to deeper structural problems and significantly more expensive repairs later. Fortunately, most physical breaches in a brick facade can be addressed with a methodical approach and the right materials.
Assessing the Severity of the Damage
Before reaching for a trowel, you must evaluate the nature and extent of the problem. Is it a simple loss of mortar, known as mortar joint deterioration, or has an entire brick become dislodged? A small hole might be confined to the surface, but a larger gap could indicate shifting in the wall’s foundation. Probing the surrounding area with a screwdriver or awl helps determine if the brick itself is sound. If the brick crumbles or breaks easily, a full replacement is necessary rather than a simple repointing job.
Identifying the Cause
Understanding why the damage occurred is just as important as fixing it. If the hole is near a downspout, the issue might be concentrated water runoff eroding the mortar. In colder climates, freeze-thaw cycles are a common culprit, where water seeps into cracks, freezes, and expands, breaking the brick apart. Sometimes, the cause is accidental, such as a lawnmower strike or a child’s rock. Addressing the root cause prevents the new patch from failing in the same way.


Gathering the Right Tools and Materials
Effective repairs begin with preparation. Working with old, brittle mortar requires specific tools to ensure you do not damage the surrounding brickwork. Having the correct materials on hand ensures the patch blends seamlessly and maintains the structural integrity of the wall.
Essential Equipment
- Safety goggles and work gloves
- Hammer drill with a carbide-tipped masonry bit
- Angle grinder with a diamond blade (for larger removals)
- Cold chisel and bolster
- Stiff brush and vacuum with brush attachment
- Mixing tub and hoe
- Bucket of water and sponge
Required Materials
- Type N or Type S mortar mix (lime-based for flexibility)
- Firebrick or matching replacement brick
- Mortar additive for bonding (optional)
- Portland cement (for structural repairs)
- Acrylic fortifier (for enhanced water resistance)
Removing the Damaged Section
The success of the patch depends entirely on the preparation of the edges. You cannot simply slather new mortar over loose material; the repair needs a solid, stable substrate to bond to. This stage is dusty and requires precision, but it is the foundation of a lasting fix.


Mortar Joints
If only the mortar is failing, use a mortar rake or an angle grinder to remove the damaged joint to a depth of at least ¾ inch. The goal is to create a clean, uniform trench. It is critical to remove all old, powdery mortar from the void. Use a vacuum to suck out the dust, then rinse the joint with water and let it dry completely. This ensures a strong bond between the new mortar and the old brick.
Missing Bricks
Replacing a brick involves more demolition. You must extract the old brick without disturbing the adjacent pieces. Gently strike the center of the brick with a hammer, then use the chisel to remove it. You will likely need to cut the mortar bed underneath using a hammer drill. Once removed, scrape the channel clean and ensure the depth matches the surrounding bricks to maintain a flat surface.
Applying the New Patch
With the cavity prepared, you can begin the restoration. The key to a professional-looking repair is the consistency of the mortar and the technique used to pack it in place.


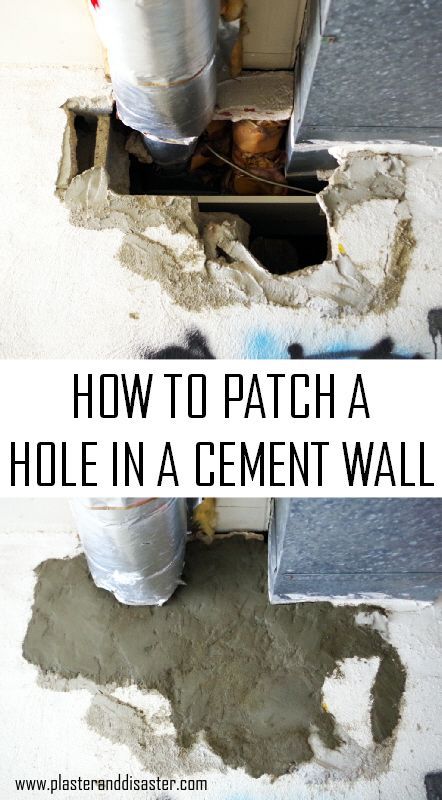
Mixing the Mortar
Follow the manufacturer’s instructions on the bag, but for best results, mix the mortar to a thick, peanut butter-like consistency. Adding a bonding agent or acrylic fortifier significantly improves adhesion and flexibility, reducing the chance of the crack returning. Mix small batches to prevent the mortar from hardening before you can use it.
Installation Technique
Begin by coating the interior walls of the hole with a thin layer of mortar. This "slip coat" helps the new material grip the old. Place the new brick or mortar bed firmly into the space. If replacing a brick, ensure the texture and color match the originals. Squeeze the mortar into the gaps, ensuring there are no air pockets. Scrape off excess mortar with the edge of your trowel, and use a sponge to clean the brick face immediately to avoid staining.
Curing and Long-Term Maintenance
After the mortar has set, the work is not quite finished. Mortar cures through a chemical reaction that requires moisture. Protecting the repair during this phase is vital to its final strength.


Curing Process
Mist the repaired area with water once or twice a day for at least three days, especially during hot or dry weather. This slow curing process prevents the mortar from drying too quickly and shrinking, which leads to cracks. Avoid applying a sealant too early; wait at least 90 days to ensure the mortar has fully hardened.
Preventative Strategies
To extend the life of your repair and prevent future holes, implement a few proactive measures. Ensure gutters and downspouts direct water away from the wall. Keep soil and mulch a few inches away from the base to prevent moisture from wicking up into the brick. A yearly inspection allows you to catch new mortar deterioration early, allowing for simple repointing before a major failure occurs.
Related Articles

The Ultimate Guide to Holes in the Wall: Discover Hidden Gems & DIY Fixes
The hole in the wall is one of those architectural features that is simultaneously ubiquitous and easily overlooked. It serves as a physical threshold, a point...

Ultimate Guide to Patching Holes in Concrete Walls: DIY Tips & Tricks
Discovering a patch hole in concrete wall is a common scenario for both homeowners and commercial property managers. Whether it is the result of a previous...

Effortless Wall Patching: Expert Tips for Flawless Fixes
Discovering a hole in your wall is an inevitable part of homeownership. Whether it is from an errant toy, a misplaced piece of furniture, or the aftermath of a...
How to Patch a Hole in a Brick Wall: DIY Repair Guide
Few things are as jarring as the sight of a hole in an otherwise pristine brick wall. Whether it is the legacy of a removed fixture, accidental damage, or the...
How to Patch a Hole in a Brick Wall: Easy DIY Steps
Discovering a hole in your brick wall can be a stressful moment, but it is far from a catastrophe. Whether it is the result of a wayward lawnmower, a playful...

Ultimate Wall Repair Patch Guide: Fix Holes Fast & Easy
Discovering a hole in your wall is a universal moment of dread, whether it’s from a misguided furniture move, a stray ball, or the slow creep of age. The key...