Garage Door Opener Springs Replacement: Cost, DIY & Safety Guide
Few household components work harder than the tension within your garage door’s springs. Every time you open or close the door, these springs absorb and release immense energy to counterbalance the weight of the hardware. Over time, this repetitive stress causes metal fatigue, leading to a dangerous failure. Understanding the signs of wear and the precise steps for garage door opener springs replacement is essential for maintaining a safe and functional home.
Identifying When Replacement is Necessary
Before reaching for tools, you must diagnose the issue accurately. A failing spring rarely fails silently; it announces its decline with specific symptoms. Recognizing these signs early can prevent a sudden door collapse, which poses a severe safety risk to anyone standing nearby.
Visual Gap Assessment
The most immediate indicator is a visible gap. When the door is closed, carefully inspect the row of coils on each spring. If you can see a distinct gap of even a quarter-inch between the coils, the spring is losing its tension and is on the verge of breaking. Do not attempt to stretch a spring to test its limits, as this stored energy can cause the metal to snap violently.


- Sudden loud bang or snap during operation.
- Door rises unevenly or tilts to one side.
- Spring appears stretched, rusty, or has visible gaps.
- Door fails to open or closes too quickly.
The Critical Distinction: Torsion vs. Extension
Effective garage door opener springs replacement begins with understanding the type of system you own. The mechanism inside your door dictates the replacement process, tools, and safety precautions required. Confusing these two types is a common and dangerous mistake.
Torsion Springs
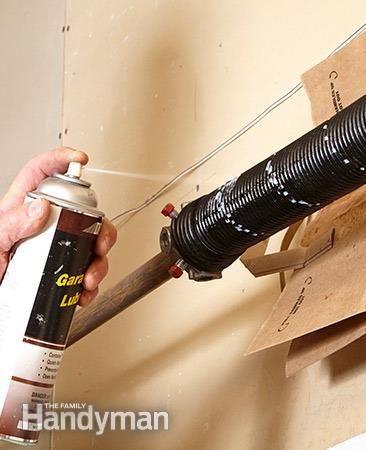
Located horizontally above the closed door, torsion springs rotate like a drum to create tension. They are generally preferred for heavier doors and offer a smoother, more balanced lift. Replacement involves winding and unwinding significant torque, which requires specific winding bars and extreme caution.


Extension Springs
Found on tracks on either side of the door, extension springs stretch to provide balance. While generally considered easier to replace than torsion springs due to the lack of winding, they operate under high tension and can cause serious injury if they snap. Always measure the old spring’s length and diameter before purchasing the replacement to ensure compatibility.
Step-by-Step Replacement Procedure
Assuming you have determined the spring type and purchased an exact match, the replacement process demands precision. The goal is to discharge the existing tension safely before installing the new component. If at any point you feel unsure, halt the process and consult a professional.
For Torsion Springs
Begin by clamping sturdy locking pliers onto the stationary cable below the winding cone. This secures the door and prevents it from falling. Using winding bars, carefully unwind the spring in the direction it is currently wound—usually "righty-tighty, lefty-loosey" applies to the reverse direction to release tension. Once fully relaxed, remove the center bracket and slide the old spring off the rod. Installation of the new spring follows the reverse order, ensuring the cone is securely tightened to the correct torque specification.


For Extension Springs
Safety cables are paramount here. Clip a high-test safety cable directly through the spring and securely anchor it to the wall or ceiling jamb. This catches the spring if it breaks during removal. Disconnect the spring from the track hooks and the center winding post. Slide the old spring out, discard it, and slide the new spring into place. Reconnect the hardware, ensuring the spring is seated correctly before slowly releasing the safety cable.
Risks and Safety Considerations
The energy stored in a standard garage door spring is equivalent to the force of a freight train. Mishandling this component is a leading cause of serious household injuries. The metal stores energy even when the door appears stationary, and the release can occur with explosive force.
If the spring breaks during the replacement process, the metal can lacerate skin or cause blunt force trauma. Furthermore, incorrect installation—such as failing to balance the tension equally on both sides—will cause the door to wear unevenly. This imbalance strains the opener motor and the rollers, significantly shortening the lifespan of other expensive components.




When to Call a Professional
While DIY replacement is possible for experienced homeowners, specific scenarios warrant an immediate call to a certified technician. If your garage door utilizes a classic "snake" type extension spring, or if the spring is mounted high above your reach, the danger escalates significantly.
Professionals possess the heavy-duty spring wrenches, reinforced safety cables, and industrial winding tools that mitigate risk. They guarantee the tension is calibrated perfectly according to the door’s weight and size. For the average homeowner, the cost of a professional service is a small price to pay for the assurance of a safe, balanced, and reliable garage door system.
Related Articles

Replacing Torsion Springs on a Garage Door: Cost, Tools, and Safety Guide
Few household maintenance tasks are as critical yet overlooked as the condition of your garage door’s torsion springs. These tightly wound components manage...

How Often to Replace Garage Door Springs: Expert Guide & Schedule
Your garage door springs are the unsung heroes of your home’s daily routine. Every time you open or close the door, these critical components are handling...

The Ultimate Guide to Garage Door Opener Installation: Easy DIY Steps
Selecting the right garage door opener with installation is a fundamental upgrade for any homeowner, transforming a heavy manual task into a seamless...

Top-Rated Garage Door Openers Reviews & Buyers Guide
Selecting the right garage door opener is a decision that impacts daily convenience, home security, and long-term value. With so many options claiming to offer...

Cracking the Code: Garage Door Extension Springs Color Chart & Guide
When a garage door fails to ascend properly, the culprit is often a set of extension springs working tirelessly behind the scenes. Understanding the specific...

Clicker Garage Door Opener Keypad Manual: Easy Setup & Troubleshooting Guide
Encountering an unresponsive clicker garage door opener keypad can be a frustrating start to the day. This small wall-mounted device serves as a vital link...