Build the Perfect Outdoor Movie Screen: DIY Guide & Tips
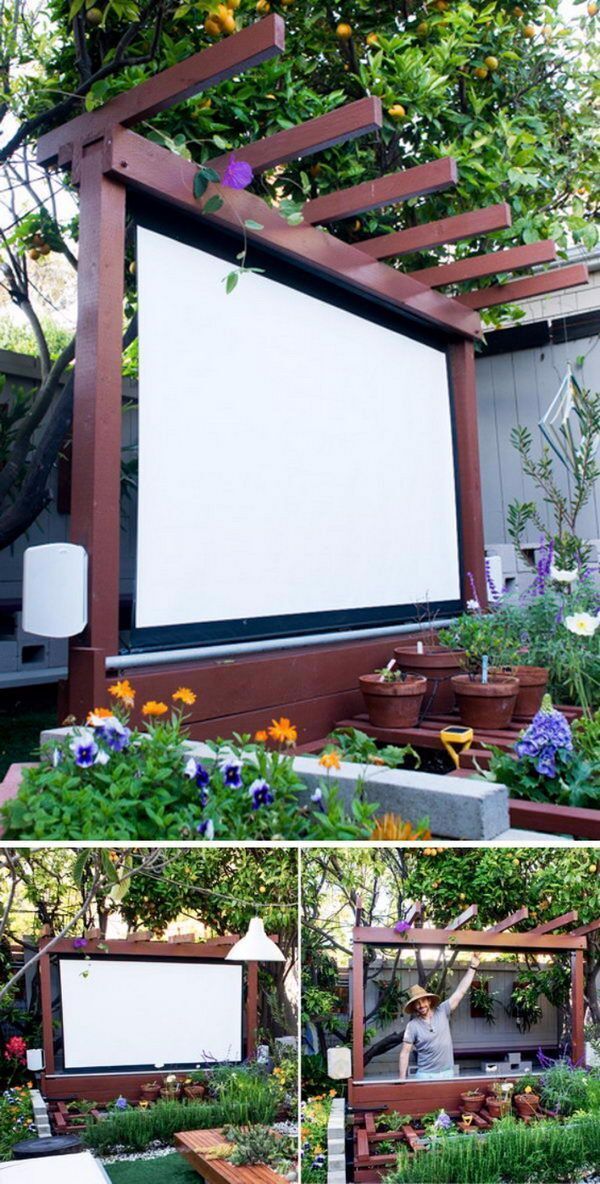
Hosting a movie night under the stars transforms an ordinary evening into a memorable event. Whether you are planning a backyard gathering for family or a community event for neighbors, a dedicated outdoor screen provides the perfect foundation for a cinematic experience. Building your own outdoor movie screen is more accessible than you might think, offering a rewarding project that saves money and delivers superior results compared to generic alternatives.
Why Build Your Own Outdoor Screen
Commercial portable screens often suffer from poor tension, waviness, and awkward transport logistics. By constructing a custom screen, you gain control over the viewing surface, ensuring a smooth, wrinkle-free display that maintains image integrity even in breezy conditions. The primary advantage lies in the ability to tailor the dimensions to your specific space and projector capabilities. This customization ensures optimal brightness and clarity, eliminating the visual compromises forced by one-size-fits-all solutions.
Planning Your Screen Dimensions
The ideal size depends on your projector's throw ratio and the seating distance. Measure the distance from your planned projector location to the screen placement area. Use this measurement to determine the appropriate width and height, ensuring the image fills the space without requiring excessive zoom or compromising the aspect ratio. For a standard 16:9 widescreen format, common dimensions range from 8 feet wide for intimate gatherings to 12 feet or more for larger audiences seeking a true cinematic feel.


Material Selection for Weather Resistance
Choosing the right materials is critical for durability against sun, rain, and wind. The screen surface requires a taut, non-porous material that reflects light evenly. Avoid standard fabric or drop cloths, as they absorb moisture and sag significantly. Instead, source a commercial-grade vinyl billboard material or specialized outdoor screen fabric. These options provide the necessary rigidity and weatherproof finish to withstand seasonal use without degrading.
Framework: Building a Stable Frame
The frame supports the screen material and dictates its tension. Wood is a popular choice for DIY projects due to its workability and strength. Construct a basic rectangular frame using 2x4s or dimensional lumber, reinforcing the corners with metal brackets or heavy-duty screws. For larger screens, incorporate center support rails to prevent bowing. If mobility is a priority, attach the frame to a rolling base or design it for easy disassembly and storage.


Mounting and Tensioning Techniques
Proper tension is the secret to a professional look. Attach the screen fabric to the frame using a staple gun, pulling the material taut as you work around the perimeter. To eliminate wrinkles, consider a dual-frame system: an outer frame for the vinyl and an inner frame that pulls the surface tight. Alternatively, use adjustable turnbuckles at the corners to fine-tune the tension after the fabric is secured, ensuring a smooth surface that performs well in various weather conditions.
Once the screen is assembled, positioning is key to maximizing your viewing experience. Place the screen on a level surface away from excessive foot traffic and wind exposure. If morning or afternoon viewing is expected, orient the screen to avoid direct sunlight, which can wash out the image. For permanent installations, embedding the frame posts into the ground or using concrete weights for portable bases enhances stability during evening movie sessions.
Integration with Your Outdoor Setup
A great screen is only one component of the home theater equation. Plan your audio setup by positioning speakers on stands or around the viewing area to create immersive sound. Ensure you have access to electricity for the projector and any ambient lighting control. Consider adding simple features like side curtains to block stray light or a small table for snacks, transforming the screen area into a fully functional outdoor theater.


Maintenance and Longevity
Proper care extends the life of your custom screen. After use, roll the fabric neatly rather than folding it to prevent creases from setting into the vinyl. Store the frame in a dry location to prevent rust on metal components and warping in wood. Clean the surface periodically with a mild soap solution and a soft brush, avoiding abrasive materials that could scratch the finish. With this maintenance routine, your screen will provide crisp, bright images for many seasons to come.




Related Articles

The Ultimate Guide to Building the Perfect Outdoor Aviary for Finches
Creating a dedicated outdoor sanctuary for finches is one of the most rewarding projects for an avian enthusiast. These small, active birds thrive when given...

Build the Perfect Workout Bench: Easy DIY Guide
Building a workout bench at home is one of the most rewarding DIY projects for anyone serious about fitness. Rather than compromising your range of motion with...

The Ultimate Guide to Potting Outdoor Plants: Expert Tips for Thriving Greenery
Potting outdoor plants is more than just placing a seedling into a container; it is the foundation of a thriving, vibrant garden display. The right pot...

The Ultimate Guide: How Do You Make a Movie Like a Pro
Making a movie is equal parts art and logistics, a journey that transforms a fragile flicker of an idea into a shared cultural experience. It requires...

Perfect Dough for Apple Dumplings: Step-by-Step Guide
Perfect dough is the foundation of any great apple dumpling, acting as the delicate vessel that encases the sweet, spiced fruit within. Achieving the right...

The Ultimate Guide to the Perfect Wedge Haircut for Men: Style, Maintenance, and Tips
For men seeking a hairstyle that balances sharp definition with enduring style, the wedge haircut male stands as a cornerstone option. This classic cut...