DIY Ceramic Tile Floor Installation: A Step-by-Step Guide
Installing a ceramic tile floor is a transformative project that elevates both the aesthetic appeal and long-term value of your home. This durable, water-resistant, and easy-to-maintain surface is a popular choice for kitchens, bathrooms, mudrooms, and entryways. However, achieving a flawless, professional-looking installation requires meticulous planning, the right materials, and a methodical approach.
Planning Your Tile Layout
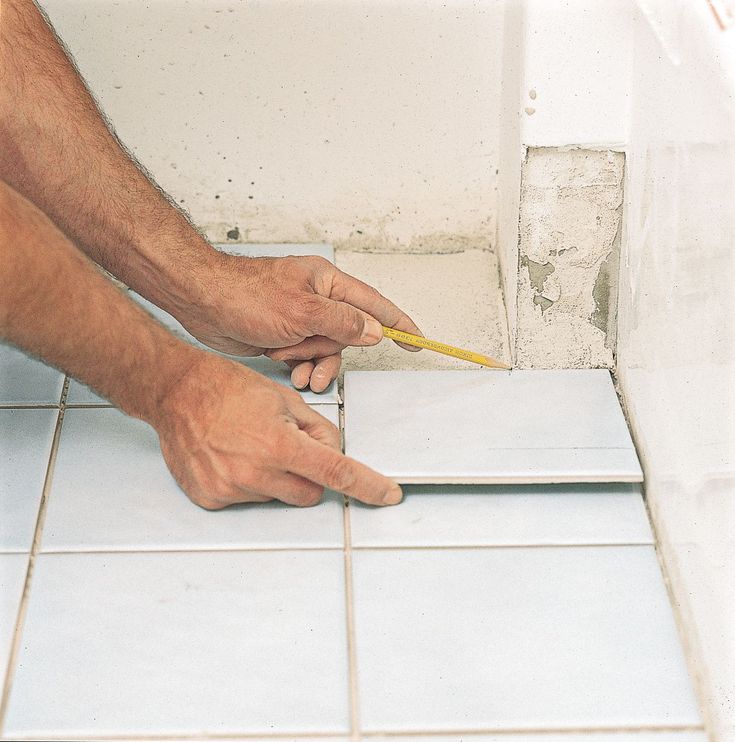
The initial planning phase is arguably the most critical step for a successful installation. Begin by measuring the room precisely and sketching a detailed diagram to map out your design. A well-thought-out layout considers the tile size in relation to the room dimensions to minimize the need for awkward, thin cuts at the edges.
For optimal visual balance, it is recommended to lay the tiles so that the final cut pieces at the walls are at least half the size of the standard tile. This principle, often referred to as the "6-inch rule," ensures a more uniform and professional appearance. Take the time to use a pencil and chalk line to mark your center points and dry-lay the tiles before committing to the adhesive.


Choosing the Right Materials and Subfloor
Selecting the appropriate materials is essential for both performance and longevity. The choice of ceramic tile will dictate the recommended type of thinset mortar. For instance, larger format tiles or those intended for high-traffic areas often require a polymer-modified thinset for superior bonding strength and flexibility.
Equally important is the condition of the subfloor. A stable, rigid base is non-negotiable. Standard plywood subfloors must be securely fastened and in good condition, while old vinyl or linoleum flooring often needs complete removal to ensure the thinset can bond directly to the porous cementitious substrate. Any unevenness or squeaks must be addressed prior to tiling to prevent future cracking.


The Installation Process Step-by-Step
With preparation complete, you can move to the physical installation. Mixing thinset mortar to the correct consistency—similar to peanut butter—is vital. Use the notched edge of a trowel to apply even ridges of mortar across a small section of the floor. This technique, known as back-buttering, creates a strong mechanical bond between the tile and the adhesive.
Work in manageable sections to prevent the mortar from drying out before you set the tiles. Press each tile firmly into the bed of mortar, twisting it slightly to ensure full coverage. Immediately check for levelness using a straightedge or laser level and spacers to maintain consistent grout lines. Correct any uneven tiles before the mortar sets, as adjustments become impossible once cured.
Grouting and Sealing for Long-Term Durability
Once the thinset has fully cured, typically after 24 hours, the grout application can begin. Choose a grout color that complements your tile; sanded grout is suitable for joints 1/8 inch and wider, while unsanded grout is ideal for narrower缝隙. Mix the grout to a smooth, peanut-butter-like consistency and apply it diagonally across the tiles using a rubber float.


After allowing the grout to set for about 15 to 30 minutes, vigorously wipe the surface with a damp sponge to remove the excess. It is crucial to rinse the sponge frequently in clean water to avoid streaking. A final polish with a soft, dry cloth will leave the grout lines clean and the tiles looking pristine.
To protect your new floor from stains and moisture penetration, apply a high-quality grout sealer once the grout has fully cured according to the manufacturer's instructions. This final step acts as a barrier, making future cleaning effortless and significantly extending the life of your beautiful ceramic tile floor.
Essential Tools and Materials Checklist
A successful installation is as much about preparation as it is about execution. Gathering all necessary tools beforehand minimizes delays and ensures a smooth workflow. From accurately cutting tiles to achieving a perfect grout finish, having the right equipment is paramount.




| Category | Essential Items |
|---|---|
| Measurement & Layout | Tape measure, carpenter's square, chalk line, pencil |
| Cutting & Shaping | Tile cutter, wet saw, tile nippers, safety glasses |
| Setting & Adhesive | Notched trowel, thinset mortar, rubber mallet, spacers |
| Grouting & Finishing | Rubber float, grout saw, grout sponge, grout sealer |
By following these comprehensive steps and paying close attention to detail, you can confidently install a ceramic tile floor that delivers a stunning, durable, and long-lasting result that you will enjoy for years to come.
Related Articles

Subway Tile Installation Instructions: Step-by-Step Guide for Beginners
Installing subway tile creates an instant upgrade in any space, providing a clean, timeless aesthetic that works in both modern kitchens and classic bathrooms...

Carpet Stair Treads Installation: The Ultimate Step-by-Step Guide
Installing carpet stair treads is one of the most effective ways to refresh the look of your home while simultaneously enhancing safety. Whether you are...

How to Install a Shower Base on a Wooden Floor: Step-by-Step Guide
Installing a shower base on a wooden floor requires careful planning and precise execution to prevent water damage and ensure structural integrity. Unlike...

DIY Ceramic Tile Backsplash Painting: A Step-by-Step Guide
Transforming a dated or damaged kitchen backsplash into a stunning focal point is one of the most cost-effective renovations you can undertake. Painting...

How to Replace One Floor Tile: Quick & Easy Guide
Replacing one floor tile might seem like a minor household chore, but doing it correctly is essential for maintaining the integrity and appearance of your...

How to Install a Shower Drain: Step-by-Step Guide
Installing a shower drain may seem like a task reserved for seasoned plumbers, but with the right guidance, it is a highly achievable DIY project that saves...