How to Restore Outdoor Furniture: Quick Guide for Weathering Damage
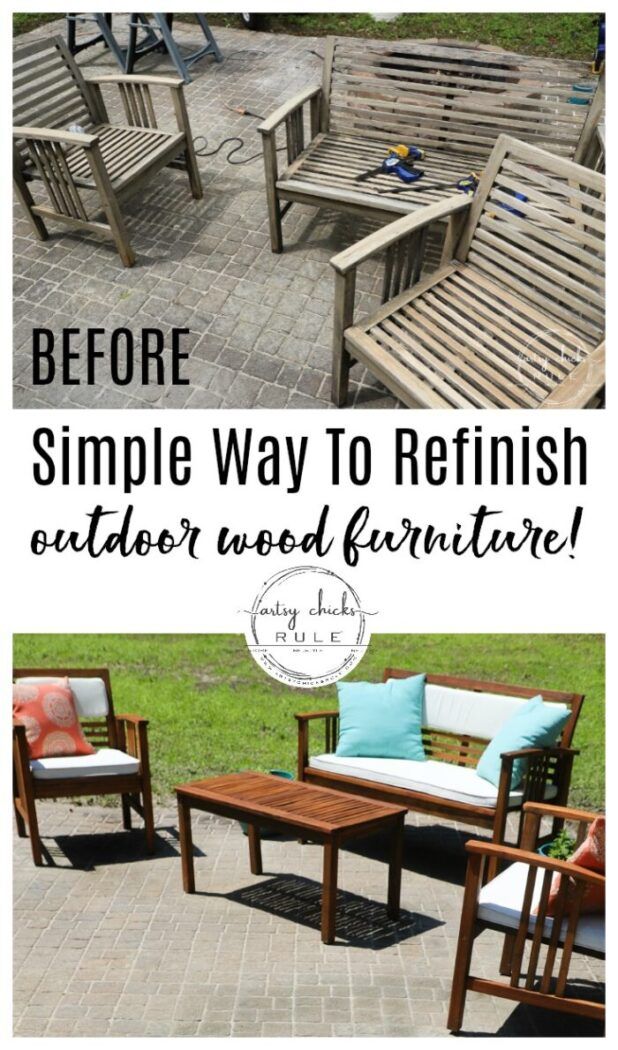
Over time, exposure to sun, rain, and temperature fluctuations can turn your once-pristine outdoor setup into a weathered eyesore. The good news is that most damage is reversible, and learning how to restore outdoor furniture can save you a significant amount of money. This process is not just about a quick coat of paint; it is a systematic method of assessment, cleaning, repair, and protection. With a little patience and the right techniques, you can bring your patio pieces back to life and extend their lifespan for many seasons to come.
Assessing the Damage
Before you reach for the sandpaper or the cleaning solution, you must understand what you are working with. The specific material of your furniture dictates the entire restoration process, so a one-size-fits-all approach will lead to disappointment. Take a moment to inspect each piece closely, looking for specific types of deterioration that require unique solutions.
Wood vs. Metal vs. Plastic
Wood furniture often shows signs of fading, graying, or mildew, and it may feel rough or splintery if the grain has risen. Metal frames, particularly those made of aluminum or wrought iron, are prone to rust and flaking paint, which usually appears as reddish-brown spots or bubbling. Plastic and resin pieces fade but rarely wear out; their main issues are brittleness from UV exposure and discoloration. Understanding whether you are dealing with a porous material like wood or a non-porous one like metal is the first critical step in choosing the correct restoration path.


Deep Cleaning the Surfaces
Restoration begins with removal. Years of built-up dirt, pollen, and road salt create a barrier that prevents any new finish from adhering properly. You cannot refinish a surface that is still dirty, so this stage is non-negotiable if you want professional results.
The Power of Specialized Cleaners
For wooden pieces, a deck cleaner or a solution of oxygen bleach is ideal for lifting grime without damaging the fibers. Metal benefits from a degreaser or a specialized rust remover to dissolve oxidation. Always rinse the furniture thoroughly with a hose and allow it to dry completely for 24 to 48 hours. Working with damp wood or applying paint to damp metal is the primary reason DIY restorations fail, so ensure the material is bone dry before moving forward.


Repairing Structural Integrity
Once clean, you need to address any physical damage. This is where the process shifts from aesthetics to function, ensuring your furniture is safe to use.
- Tightening and Fastening: Walk around the piece and wobble it gently. If you find any movement, tighten the bolts, screws, or nuts using the appropriate tools. Wood furniture often requires re-gluing joints; use a high-quality wood glue and clamps to secure loose corners.
- Filling and Sanding: For wood, cracks and holes need to be filled. Wood filler is inexpensive and easy to apply; once dry, sand it flush with the surrounding surface using medium-grit sandpaper (around 120 grit) followed by a finer grit (220) for a smooth finish.
- Rust Removal: On metal, use a wire brush or rust-removing sandpaper to scrub the rusty spots until you see clean, bare metal. If the rust is deep, a rust converter can stabilize it, turning the rust into a paintable surface.
Refinishing and Protection
With the structure sound and the surface clean, you can now apply the products that breathe new life into the furniture.
Choosing the Right Finish
Wood requires a durable finish that can handle UV rays and moisture. While paint is an option, a high-quality exterior-grade stain or oil (such as teak oil or a spar urethane) is often preferred because it enhances the natural grain while sealing the wood. For metal, a rust-inhibiting primer followed by a durable spray paint designed for outdoor use is the standard. For plastic, a simple cleaning might be enough, or you can use a plastic-specific protectant to restore shine and prevent further fading.



Weatherproofing and the Final Seal
The final step is arguably the most important if you want to avoid doing this again next year. Even after applying stain or paint, your furniture is vulnerable until it is fully cured and protected.
Apply a clear, waterproof sealant or outdoor furniture wax. This layer acts as a shield against rain, dew, and UV damage. For fabrics on cushions or covers, consider applying a fabric guard that repels liquids. Remember to keep furniture away from direct downspouts or areas where water can pool, as proper drainage is just as important as the sealant itself.


Related Articles

Fix HVAC Outdoor Fan Not Running: Quick Troubleshooting Guide
A silent outdoor fan is often the first sign that your HVAC system is in distress. This specific symptom indicates that the unit is failing to dissipate heat...

Revive & Restore: The Ultimate Guide to Cleaning Old Wood Furniture
Reviving a piece of history begins with understanding how to clean old wood furniture properly. Over decades, these cherished items accumulate a complex layer...

Water Damage Wood Floor: Repair, Restore & Prevent Guide
Water damage wood floors present a serious threat to the structural integrity and aesthetic appeal of any home. Immediate recognition of the signs is crucial...

Fix iTunes Not Burning CDs: Quick Solutions & Troubleshooting Guide
If you have ever attempted to create a custom audio compilation in Apple's native software, you have likely encountered the frustrating issue where iTunes...

Spray Paint Wicker Furniture: The Ultimate Refresh Guide
Refreshing a tired wicker chair or table is one of the most cost-effective ways to transform a piece of outdoor decor. While brushing on traditional paint can...

Sudden Garbage Disposal Stops Working? Quick Fixes & Troubleshooting Guide
There is nothing more disheartening than turning the handle on your kitchen sink to find that the garbage disposal has stopped working suddenly. What was once...