Erase Burn Marks on Wood: The Ultimate DIY Repair Guide
Few things are as disheartening as pulling a hot dish from the oven or moving a candle a little too close to the edge of the table, only to find a fresh, ugly burn mark marring an otherwise perfect piece of wood. Whether it is a cherished dining table, a finely crafted countertop, or a beloved piece of furniture, these scorch marks can feel like a permanent eyesore. The good news is that most wood burn marks are treatable, and removing them is often a matter of understanding the depth of the damage and applying the right technique with patience and care.
Wood reacts to heat in distinct ways, and identifying the severity of the burn is the critical first step in the restoration process. A surface-level mark might only darken the finish, while a deeper scorch can actually carbonize the wood fibers, leaving a brittle, raised texture. Before reaching for any solution, lightly scratch the surface of the mark with your fingernail. If the mark sits primarily on the finish and flakes away, you are dealing with a surface issue. If the scorching has penetrated the wood itself, you will be working to either camouflage the damage or remove it entirely through sanding and refinishing.
Tackling Surface Heat Marks
When the wood is intact and the damage is limited to the finish, the goal is to coax the finish back to its original state without stripping the surrounding area. Heat can often compress the finish, leaving a white or dark ring that looks stark against the rich tone of the wood. Fortunately, these surface blemishes often respond well to simple household treatments that gently reactivate or dissolve the compressed finish.


The Gentle Heat Method
This counterintuitive technique works wonders on white water rings or light surface burns caused by hot pots or plates. The idea is to use low-level heat to re-melt the finish that was damaged by the cold compress or hot item, allowing it to bond back together and become transparent again.
- Set your iron to the lowest steam setting and turn it off.
- Place a thin, absorbent cloth—such as a cotton dish towel or a microfiber cloth—directly over the burn mark.
- Gently press the warm iron onto the cloth, moving it in slow, small circles for no more than 5 to 10 seconds.
- Lift the cloth periodically to check progress; the heat should transfer moisture from the cloth back into the finish, encouraging it to swell and disappear.
The Oil or Fat Trick
If the heat method proves insufficient, turning to the natural lubricating properties of common oils can help to mask the mark. The oil or fat seeps into the fine pores of the wood, temporarily darkening the area and reducing the contrast between the burn and the surrounding surface.


- For a slightly greasy finish that buffs away, rub a walnut half or a pecan piece over the mark. The natural oils will darken the white ring.
- For a more potent treatment, apply a few drops of mild vegetable oil or even Mayonnaise directly to the burn.
- Cover the area with a cloth or plastic wrap and let it sit for several hours or overnight to allow the oil to penetrate.
- Wipe the area clean and buff with a soft cloth to restore the sheen.
Addressing Deep Scorches and Carbonization
When a finish is compromised and the wood itself has burned, the surface will often feel rough or fuzzy to the touch. This carbonized layer is the burnt wood material, and it requires a more aggressive approach than surface treatments. You must physically remove the damaged layer to reveal the clean wood beneath.
Start with the least aggressive method and only move to more drastic measures if necessary, as removing deep burns often requires removing a significant amount of material.
Light Abrasion with Steel Wool
Very light scorch marks that have not penetrated deeply can sometimes be faded using fine-grade steel wool. This method is ideal for cleaning up minor imperfections on harder woods without altering the finish too drastically.


- Wrap a piece of fine steel wool (grade #0000) around a soft cloth or your finger.
- Gently buff the burn mark in the direction of the wood grain.
- The micro-abrasion will remove the top layer of carbonization and help the surrounding finish blend together.
- Wipe away the residue with a damp cloth and inspect the area.
Sanding to the Rescue
For stubborn burns that have penetrated the surface, sanding is the most reliable solution. This process involves removing the damaged wood layer until you reach untouched material, effectively erasing the stain.
| Grit Level | Use Case |
|---|---|
| 120-150 Grit | Removing deep carbonization and significant discoloration. |
| 180-220 Grit | Smoothing the surface after the major burn has been sanded through. |
| 320 Grit | Final preparation before applying a new finish. |
When sanding, always move in the direction of the grain to avoid creating new scratches. If the burn is located on a flat surface, use a sanding block to ensure even pressure. For edges or contours, fold the sandpaper to fit the profile. After sanding the burn away, gradually work your way up through finer grits to create a smooth transition with the surrounding wood.
Restoration and Finishing
Once the burn is removed and the surface is smooth, the area will likely be lighter than the surrounding finished wood because you have exposed the raw wood. To blend the repair, you will need to add color back to the spot.


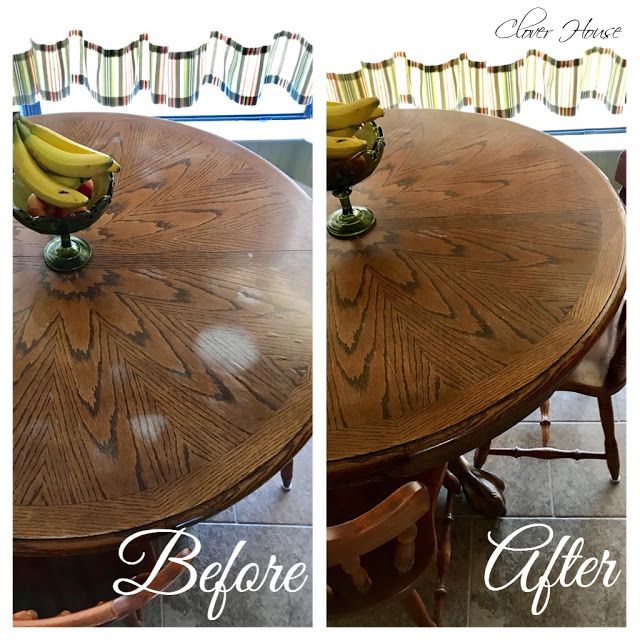


Wood stains are incredibly effective at evening out these patches. Apply a small amount of stain to a soft cloth and gently dab it onto the sanded area, building the color gradually until it matches the adjacent surface. It is better to add too little than too much; you can always add more, but you cannot take it away.
After the stain dries, apply a finish that matches the rest of the piece. If the wood was previously oiled, use an oil finish; if it was lacquered, use a lacquer. Applying a finish protects the newly exposed wood and ensures the repair integrates seamlessly with the rest of the surface, making the burn mark a memory rather than a visible flaw.
Related Articles
Erase Black Burn Marks on Wood: The Ultimate Restoration Guide
Few things are as disheartening as seeing a cherished piece of wood marred by a black burn mark. Whether it's the lingering shadow of a hot coffee mug, the...
Erase Heat Stains on Wood: The Ultimate Restoration Guide
Discovering a heat stain on your wooden furniture or flooring can be a frustrating experience. These unsightly white or dark rings are often the result of a...

Sunblock Stain Removal: Ultimate Guide to Erase Marks on Any Fabric
Removing sunblock stains from fabrics and surfaces requires a methodical approach because the combination of oil, zinc oxide, and water-resistant compounds...

The Ultimate Guide to Safe Fireplace Wood: What You Can Burn
Selecting the right wood for your fireplace is the single most important factor in achieving a safe, efficient, and enjoyable fire. The type of wood you burn...

The Ultimate Guide to Removing Marks from Walls: Expert Tips & Tricks
Few things disrupt the clean lines of a home faster than scuffed walls. From wayward pencil marks to greasy fingerprints, these blemishes are an inevitable...

How to Fix Pixel Burn: Ultimate Guide to Repair Stuck Pixels
Pixel burn, often referred to as screen burn-in, is a persistent and frustrating issue that primarily affects OLED and plasma displays. It occurs when static...