Master the Art of How to Paint Wrought Iron: A Step-by-Step Guide
Preparing wrought iron for a new coat of paint is about more than just aesthetics; it is a crucial preservation strategy. Metal that is often exposed to the elements requires a methodical approach to surface preparation to ensure the finish lasts. Success in this project hinges on patience during the prep stage, as a flawless base will dictate the durability and professional look of the final result.
Assessing the Current Surface Condition
Before you ever open a paint can, you must evaluate the condition of the existing finish. Is the iron currently powder coated, or is it raw, weathered metal? If old paint is present, you need to determine if it is sound or if it has begun to peel and crack. Flaking paint must be completely removed, as painting over loose material will only trap moisture and guarantee future failure.
Look for areas of rust, which typically appear as reddish-brown flaking. While some surface oxidation is normal, active rust will bleed through any new paint layer. You should also check for previous repairs; if the iron was welded or patched, those areas might be smoother or glossier than the original metal, requiring extra attention to create a uniform texture.


Essential Tools and Materials for Preparation
Having the right tools on hand streamlines the process and encourages thoroughness. You will need varying grits of sandpaper, ranging from coarse 80-grit for heavy stripping to fine 220-grit for smoothing. A sturdy wire brush and a rust removal tool are essential for reaching the intricate details of scrollwork and ornate sections that sandpaper cannot access easily.
- Chemical rust converter or phosphoric acid solution
- High-quality metal primer specifically for outdoor use
- Oil-based or specialized metal paint for durability
- Paint brushes, rollers, or a spray gun
- Drop cloths and painter's tape
Step-by-Step Sanding and Stripping Process
Mechanical removal of old material is the backbone of a successful paint job. You should start with a coarse grit to strip the bulk of the old paint or rust, then gradually move to finer grits. Skipping this gradual progression leaves deep scratches that provide uneven surfaces for the primer to grip.


For intricate designs, wrapping sandpaper around a small block ensures you maintain the shape of the ornamentation without flattening the details. If the piece is large enough, using a power sander or a wire wheel on a drill can significantly reduce the time required, but hand-sanding is often necessary for tight corners to guarantee no bare metal is missed.
Treating Rust and Metal Imperfections
Once the surface is down to bare metal, addressing the rust is the next critical step. A rust converter is a chemical solution that penetrates the pores of the metal, transforming active rust into a stable, paintable surface. This is a vital step if you cannot remove every particle of rust physically.
After applying the converter, you must allow the metal to dry completely. The resulting compound is usually black or dark brown, creating a uniform slate that prevents the old corrosion from resurfacing. For scratches or deep gouges, applying a metal-filled body putty will level the surface, ensuring the paint layer above is smooth.


The Critical Role of Priming
Applying a primer is not merely a preparatory step; it is the primary defense against future corrosion. A high-quality zinc or rust-inhibitive primer bonds tightly to the metal, sealing it from oxygen and moisture. This layer also improves the adhesion of the topcoat, preventing peeling that occurs when paint sticks to a slick, unprepared surface.
When spraying, maintain a consistent distance to avoid pooling, which often occurs at the edges of complex shapes. Allow the primer to cure according to the manufacturer's instructions, as sanding the primer too early can gumming up your sandpaper, while sanding too late risks removing the entire layer.
Painting and Finishing Techniques
With the primer cured, you are ready to apply the final color. It is recommended to use a paint specifically formulated for metals, as these contain binders that flex with the natural expansion and contraction of the iron. Applying thin, even coats is superior to one thick layer, which will likely drip and sag, particularly on vertical surfaces.


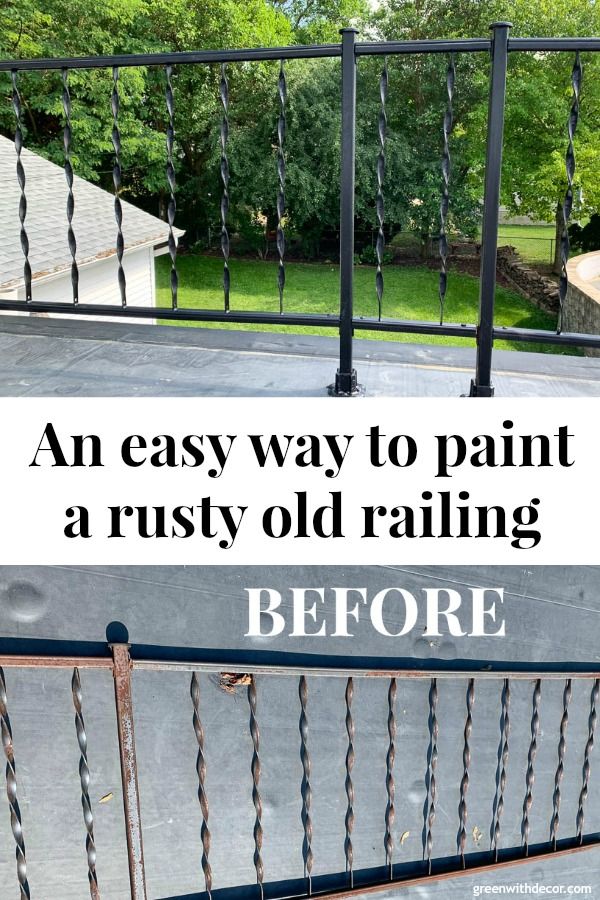


After the first coat dries, inspect the surface under good lighting to catch any missed spots or runs. A second coat usually provides the necessary opacity and richness of color. Once the paint is fully dry, a light buffing with a soft cloth will remove any minor imperfections, leaving a finish that looks professionally installed.
Related Articles
The Ultimate Guide to Paint for Wrought Iron Furniture: Durable, Weather-Resistant Finishes
Selecting the correct paint for wrought iron furniture is the most critical step in ensuring its longevity and visual appeal. Unlike wood or plastic, raw metal...

How to Paint Kitchen Cabinet Doors: A Step-by-Step Guide
Refreshing your kitchen without a full remodel is entirely possible, and one of the most cost-effective transformations comes from painting the cabinet doors...

Master the Art of Saving Calendula Seeds: A Step-by-Step Guide
Saving calendula seeds is a rewarding practice that connects you directly to the lifecycle of one of the garden’s most resilient and beneficial plants...

Master Pencil Tricks: Easy Step-by-Step Guide
Mastering the pencil trick is less about supernatural dexterity and more about understanding leverage, friction, and the subtle art of misdirection. This...

Master How to Create Pivot Table: The Ultimate Step-by-Step Guide
Mastering data organization is essential in today’s information-driven world, and learning how to create a pivot table is one of the most valuable skills for...

Master How to Draw Lines in Photoshop: Easy Step-by-Step Guide
Mastering the line is fundamental to digital art, and Adobe Photoshop provides a robust set of tools to create everything from subtle design guides to...