Master How to Paint Porcelain Tile: Step-by-Step DIY Guide
Painting porcelain tile is one of the most effective ways to refresh a space without the cost and disruption of a full remodel. Whether you are updating outdated bathroom floors or adding a custom design to a kitchen backsplash, this process requires specific materials and meticulous preparation to ensure a durable finish. Unlike standard wall paint, porcelain is non-porous and extremely smooth, which means standard paint will simply slide off if the surface is not pre-treated correctly.
The fundamental challenge with porcelain is its glossy, glass-like surface, which provides no grip for paint adhesion. To overcome this, you must chemically alter the surface texture by etching or sanding it, creating a rough profile for the paint to bond to. Skipping this step is the primary reason DIY attempts fail, resulting in chipping and peeling within weeks. Success relies on using a bonding primer specifically formulated for slick surfaces, which acts as a mechanical lock between the tile and the final coat.
Preparing the Tile for Paint
The preparation phase is arguably more important than the painting itself. You must remove all the existing shine and any residual grout haze to guarantee the paint adheres evenly. Because porcelain is often used in areas exposed to moisture, old cleaning products or soaps can create a invisible barrier that prevents the new paint from sticking.


Cleaning and Degreasing
Begin with a deep clean using a heavy-duty degreaser or trisodium phosphate (TSP) substitute to cut through soap scum and hard water deposits. It is critical to rinse the tile thoroughly with clean water and dry it completely with a lint-free cloth. Any lingering moisture or cleaning residue will turn into vapor during the painting process, causing the paint to bubble and peel immediately.
Etching and Sanding
To create a physical texture, you need to roughen the surface. You can use a porcelain etching kit containing a mild acid that eats away the gloss, or use a fine-grit sanding block. If you choose to sand, work evenly across the surface until the tile loses its reflective sheen. After sanding, you must vacuum the area and wipe the tile with a damp rag to remove all dust particles; even tiny specs of dust will create bumps in the final finish.


Priming the Surface
Once the tile is clean and roughed up, the next critical step is applying a high-quality bonding primer. This specialized product is designed to grip slick surfaces and provide a grippy base for the topcoat. Using a standard interior primer will likely result in failure, as it lacks the necessary adhesion properties for non-porous materials.
Application Techniques
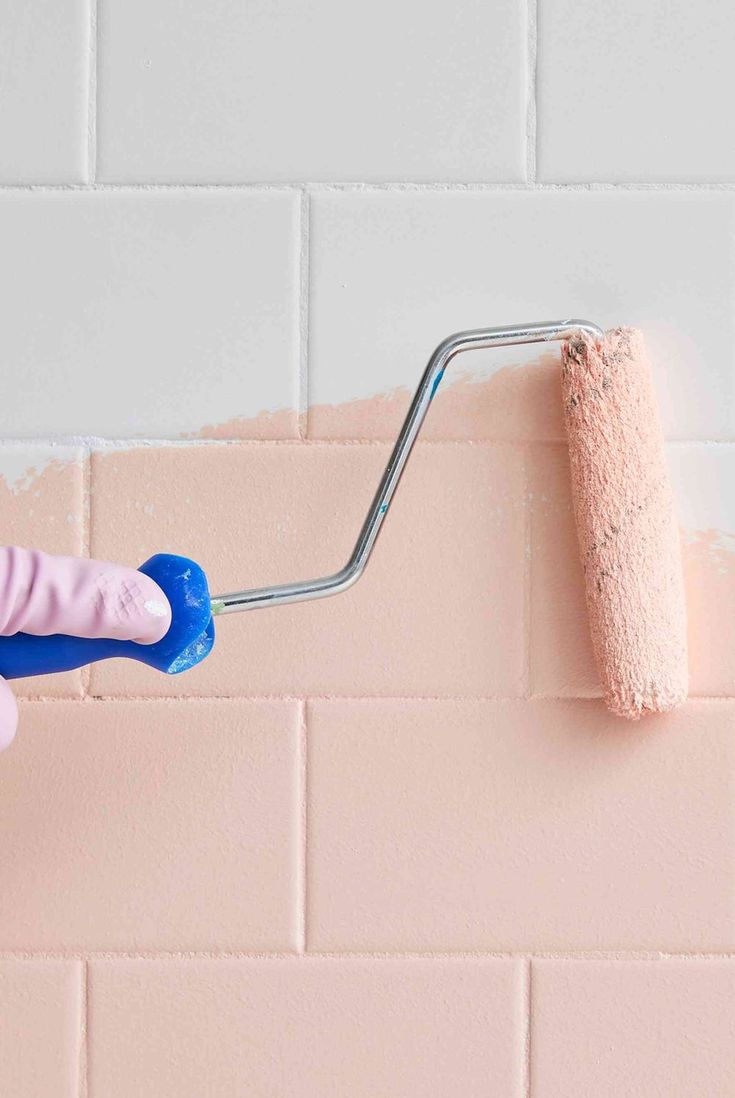
Apply the primer using a high-density foam roller for large, flat areas to achieve a smooth, thin layer. For edges, corners, and grout lines, use a small artist brush to ensure full coverage. Allow the primer to cure for the manufacturer’s recommended time—usually 24 hours—before proceeding. Touch the surface lightly; if it feels sticky or tacky, it has not cured enough to paint.
Choosing and Applying the Paint
Not all paints are equal when it comes to porcelain. You should use a 100% acrylic enamel paint or a specialized porcelain paint, which offers the hardness and flexibility needed to withstand moisture and temperature fluctuations. Standard matte or eggshell paints are too soft and will scratch off with regular use.


Finishing the Coat
Apply the paint in thin, even coats using a foam roller for large areas. Roll in one direction first, then lightly cross over to smooth out any ridges. Avoid heavy application, as thick layers are prone to dripping and prolonged drying times. Depending on the opacity of your chosen color, two thin coats are usually superior to one thick coat.
Sealing for Durability
After the paint has fully dried, sealing the tile is essential for longevity. A clear, water-based polyurethane topcoat protects the finish from scratches, chips, and steam damage. This step is non-negotiable in high-traffic areas or bathrooms where humidity is consistently present.
Topcoat Application
Use a clean foam brush or a sprayer to apply the sealer in a well-ventilated area. Ensure the room temperature is appropriate for the product to cure correctly. Apply the sealer evenly, watching for runs or puddles. Depending on the product, you may need to wait a few hours between coats, and usually, two to three coats are required for adequate protection.




Final Considerations and Tips
Timing is everything when painting porcelain tile. Avoid starting the project in high humidity or extreme heat, as this can cause the paint to dry too quickly or remain soft. Plan the project for a stable, cool day to ensure proper curing. Additionally, if the tile is on the floor, ensure the surface is level; rolling over high spots with a roller can help identify issues before painting.
While the process involves several steps, the transformation is significant and offers a high-end look at a fraction of the cost. By respecting the chemistry of adhesion—cleaning, etching, priming, and sealing—you can achieve a finish that looks like professionally installed tile. Take your time with each stage, and the result will be a beautiful, durable surface that enhances your home for years to come.
Related Articles

The Ultimate Guide to Installing Porcelain Floor Tile: Step-by-Step DIY Tutorial
Installing porcelain floor tile is a smart upgrade that brings durability, style, and easy maintenance to any space. Whether you are refreshing a kitchen...

How to Paint Kitchen Cabinet Doors: A Step-by-Step Guide
Refreshing your kitchen without a full remodel is entirely possible, and one of the most cost-effective transformations comes from painting the cabinet doors...

Master the Art of Saving Calendula Seeds: A Step-by-Step Guide
Saving calendula seeds is a rewarding practice that connects you directly to the lifecycle of one of the garden’s most resilient and beneficial plants...

Master Pencil Tricks: Easy Step-by-Step Guide
Mastering the pencil trick is less about supernatural dexterity and more about understanding leverage, friction, and the subtle art of misdirection. This...

Does Porcelain Tile Need to Acclimate? The Essential Guide
When preparing for a new tile installation, the question "does porcelain tile need to acclimate" often arises. While porcelain is celebrated for its density...

Master How to Create Pivot Table: The Ultimate Step-by-Step Guide
Mastering data organization is essential in today’s information-driven world, and learning how to create a pivot table is one of the most valuable skills for...