The Ultimate Guide to Making Creamy Vanilla Ice Cream at Home
There is a distinct satisfaction in scooping into a bowl of ice cream you have created yourself, a feeling that transcends the simple sweetness of the dessert. Making vanilla ice cream at home is not just a recipe; it is a journey into the fundamentals of flavor and texture, allowing you to connect with the process in a way that store-bought pints never can. This guide provides a detailed pathway to crafting a luxurious, creamy vanilla base that serves as the perfect canvas for your culinary imagination.
The Science Behind the Silkiness
Understanding the "why" behind the steps transforms a basic task into a rewarding experience. The hallmark of great ice cream is its dense, creamy texture, which is achieved by carefully managing ice crystal formation. As the mixture freezes, ice crystals grow; larger crystals result in a gritty, unpleasant mouthfeel. To prevent this, we rely on two key components: fat and sugar. The heavy cream in our recipe provides the fat, which coats the ice crystals and inhibits their growth, creating a smooth matrix. Sugar, meanwhile, lowers the freezing point of the mixture, ensuring it remains soft and scoopable even when stored in the freezer.
Essential Ingredients and Equipment
Success begins with quality ingredients and the right tools. For a classic vanilla ice cream, you will need heavy cream, whole milk, granulated sugar, pure vanilla extract, and egg yolks. The yolks act as an emulsifier, helping to create a stable and velvety texture. While a blender might seem like a shortcut, a dedicated ice cream maker is the most effective tool for churning air into the mixture while freezing it simultaneously. However, if you do not have one, a shallow baking dish and a willingness to manually stir the mixture every 30 minutes will still yield a delicious, if slightly icier, result.


Core Ingredients
- Heavy cream (for richness and fat content)
- Whole milk (for balance and structure)
- Granulated sugar (for sweetness and freeze control)
- Large egg yolks (for emulsification and creaminess)
- Pure vanilla extract (for signature flavor)
- Vanilla bean paste or seeds (for visual specks and intense aroma)
Crafting the Base: A Gentle Heat
The initial step involves creating a stable custard base, which requires careful temperature management. You will gently heat the milk, sugar, and vanilla until the sugar dissolves and the mixture is hot but not boiling. Separately, you will whisk the egg yolks with the remaining sugar until the mixture lightens in color and thickens slightly. The critical technique here is tempering: slowly whisking the hot milk mixture into the egg yolks. This gradual introduction prevents the eggs from scrambling due to the sudden heat, resulting in a smooth, thick base rather than a curdled mess.
The Chilling Imperative
Patience is a virtue, especially when dealing with temperature. Once your custard base is fully combined, it must be chilled thoroughly before churning. Placing the warm mixture directly into the ice cream maker will fail to freeze the base properly, resulting in a slushy texture. Cover the bowl and refrigerate the mixture for at least four hours, or ideally overnight. This resting period not only ensures the liquid is cold enough to freeze rapidly but also allows the flavors to meld and deepen, creating a more complex and satisfying vanilla profile.


The Transformation: Churning and Freezing
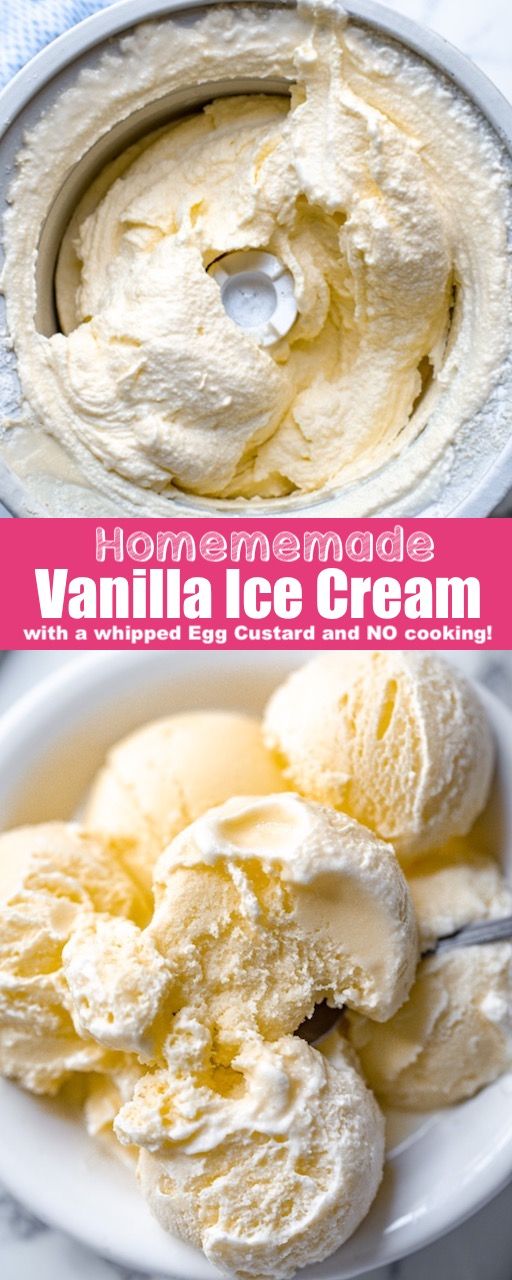
With the base properly chilled, the magic begins in the ice cream maker. Pour the cold mixture into the machine and start churning according to the manufacturer's instructions. The churning process incorporates air into the liquid while the freezing element keeps it from solidifying into a block of ice. You will observe the texture change dramatically, transforming from a thin liquid into a soft, creamy substance similar to soft-serve. For a denser, richer texture, stop the machine when it reaches the desired consistency; for a lighter texture, allow it to churn a bit longer.
Storage and Customization
To maintain the integrity of your hard work, proper storage is essential. Transfer the freshly churned ice cream to an airtight container and press a piece of plastic wrap directly onto the surface before sealing. This barrier prevents ice crystals from forming on the top layer, preserving that smooth texture for days. While vanilla is a classic, this base is incredibly versatile. Fold in fresh fruit, swirl in chocolate ganache, or sprinkle in cookies—your homemade creation is the perfect foundation for endless flavor experiments.


Related Articles

The Ultimate Guide to Making French Hot Chocolate at Home: Creamy & Decadent Recipe
There is a distinct kind of alchemy that happens in the kitchen when ordinary ingredients transform into something extraordinary. Few experiences are as...

Extend Jean Life: Ultimate Guide to Making Jeans Last Longer
Jeans are a wardrobe staple, but few garments endure the daily grind of washing, wearing, and life’s unexpected moments. Extending their lifespan isn’t about...

The Ultimate Guide to Making a Perfect Snowman With Snow
Building a snowman is a timeless winter activity that brings joy to children and adults alike. The process begins with a simple question: how to make a snowman...

Creamy Dream 8oz Cream Cheese: The Ultimate Guide to Perfect Recipes
8oz cream cheese is a kitchen staple that offers the perfect balance of richness and versatility. This specific quantity is a standard size found in most...

Mastering Ramen At Home: The Ultimate Guide To Delicious Homemade Bowls
Good ramen is often defined by its depth, a lingering savory echo that coats the tongue long after the last spoonful. Achieving this balance of rich umami...

The Ultimate Guide to Making a Wood Chair: Step-by-Step Tutorial
Building a wood chair is a rewarding journey that combines practical skill with artistic design. This process transforms a raw log into a functional piece of...